- Help Center > Company Setting・Organization Management > SSO・Provisioning > Microsoft Entra ID( AzureAD ) > [Entra ID] Group Provisioning Settings
[Entra ID] Group Provisioning Settings
Answer
Contents
Acall supports user and group provisioning for Microsoft Entra ID.
This page describes how to set up to use group provisioning.

If you want to use group provisioning, please set up the "[Entra ID] SSO / Provisioning Common Settings" and "[Entra ID] Provisioning Settings" before start the settings on this page.
Delete existing groups on Acall
It is not possible to sync existing groups on Acall with groups in Entra ID.
If you have already manually created groups on Acall that you want to sync through provisioning, please delete the existing Acall groups before provisioning the group to avoid double registration.
Please refer to "Can I sync existing Acall groups with IdP groups?" for more information.
Set up Group Provisioning
Assign Groups To Acall App
Assign groups that need to be enabled for Provisioning and SSO to Acall app.

If you have Microsoft Entra ID P1 or P2 license, Group-based assignment to Acall app is available.
However, application assignment using group hierarchic structure is not supported.
If you want to synchronize groups that are hierarchically structured on the IdP to Acall, please be sure to read "Can I synchronize the hierarchical structure of groups on the IdP?".
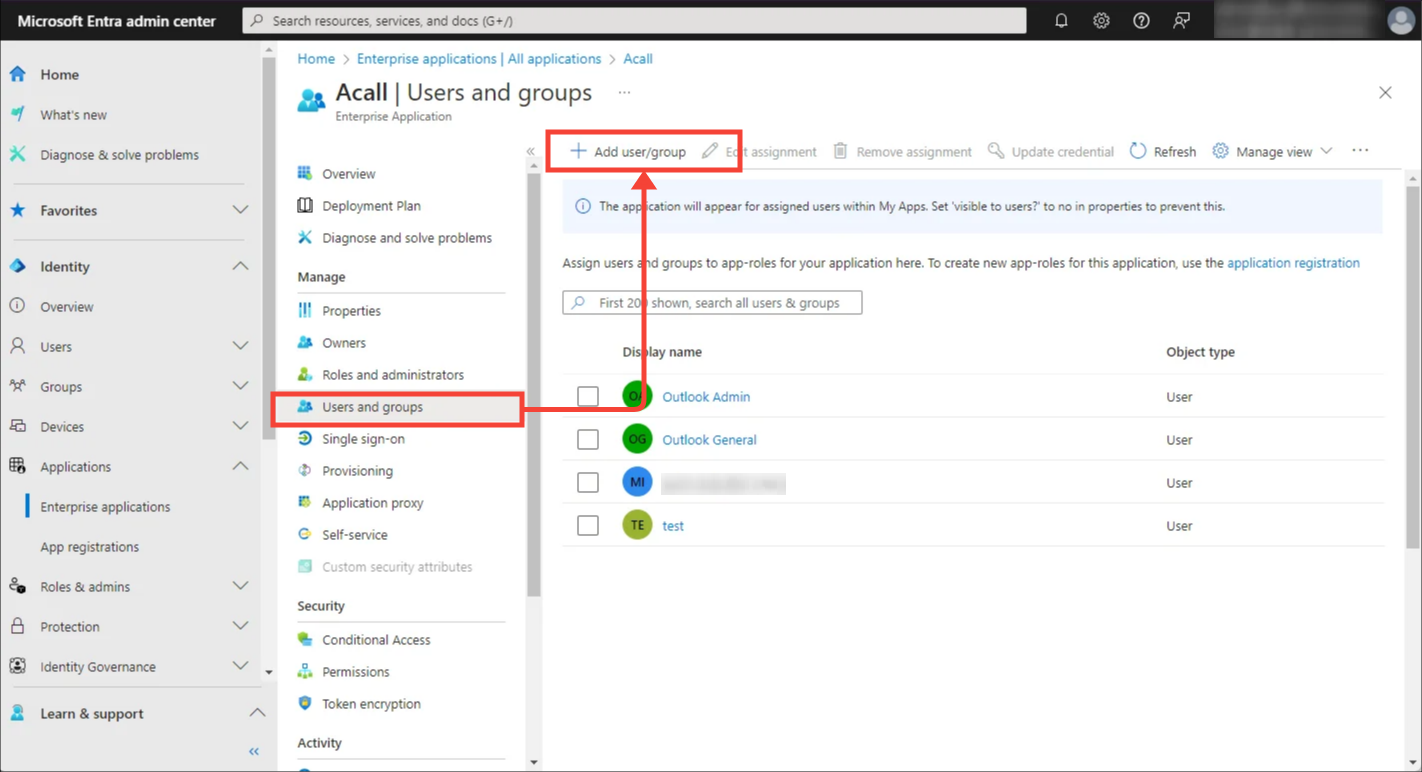
Open [Users and groups] menu of Acall application and then click [+ Add user/group].
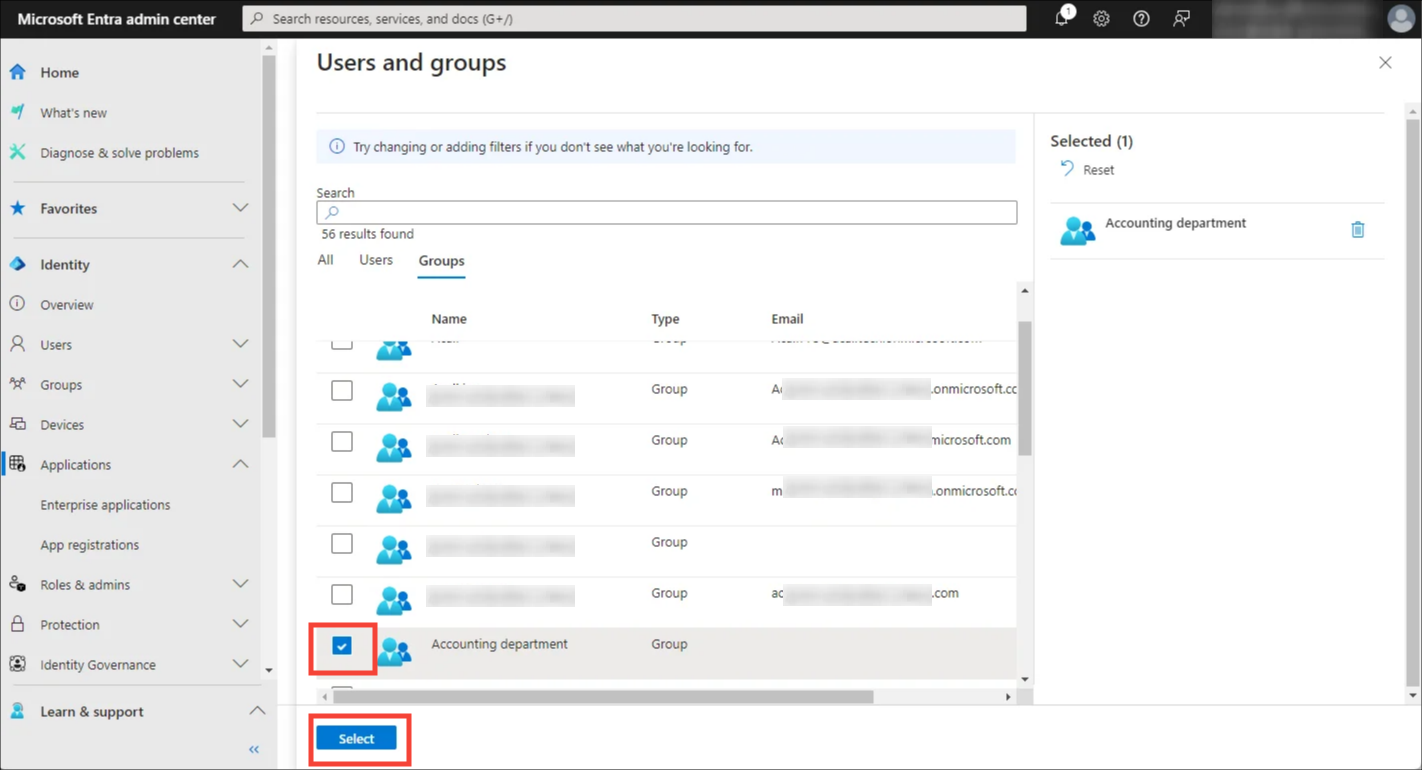
Select the group for which you want to enable provisioning.
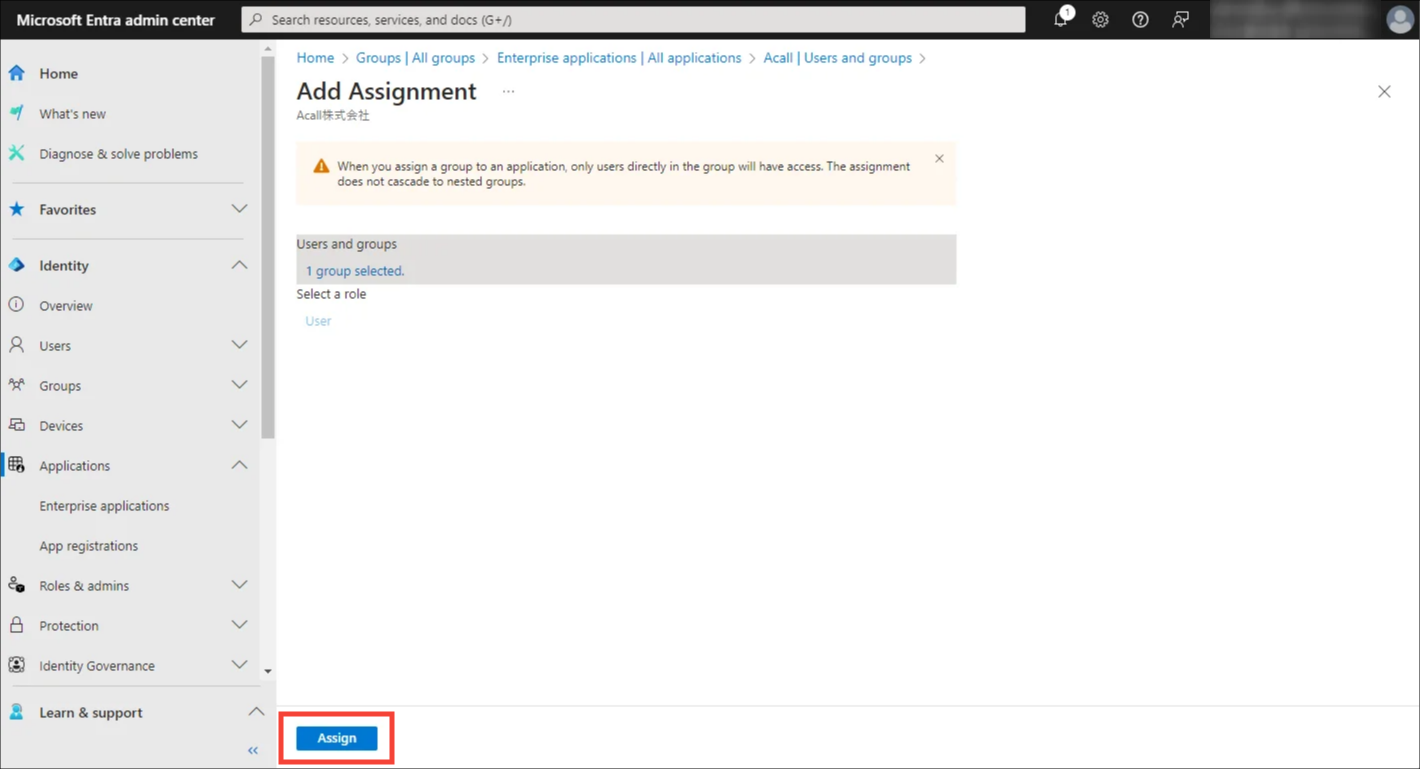
Click [Assign].
Attribution Mapping
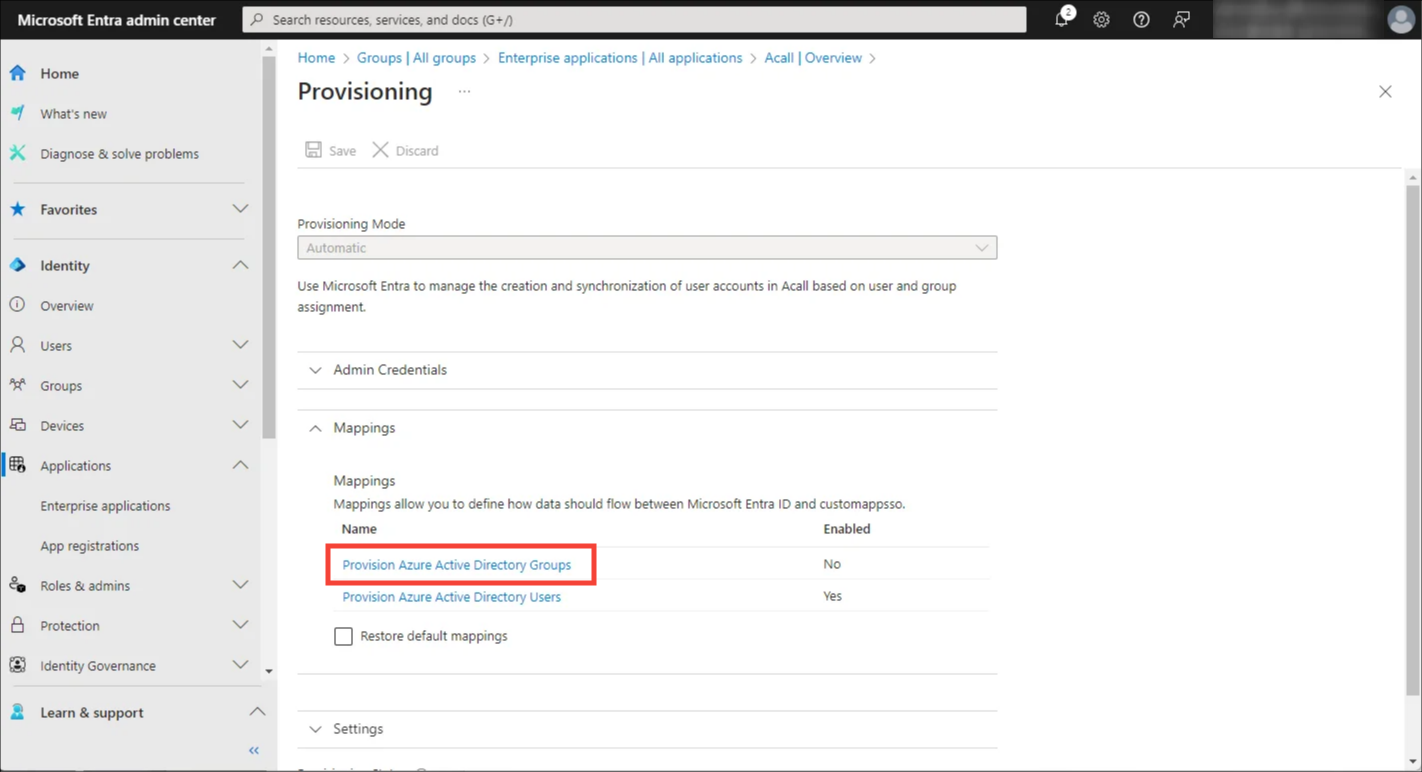
Expand [Mappings] and click [Provision Microsoft Entra ID Groups].
Set up mappings as shown in the tables below.
| Microsoft Entra ID setting (Mapping types) |
Microsoft Entra ID setting Source attribute ( Microsoft Entra ID attribute) |
Microsoft Entra ID setting Target attribute (customappsso attribute) |
Acall attribute |
|---|---|---|---|
| Direct | objectId | externalId | provisioning_external_id (external ID) *Group verification key between Microsoft Entra ID and Acall |
| Direct | displayName | displayName | Group name |
| Direct | members | members | Member |
Setup Key Attributes For group Matching
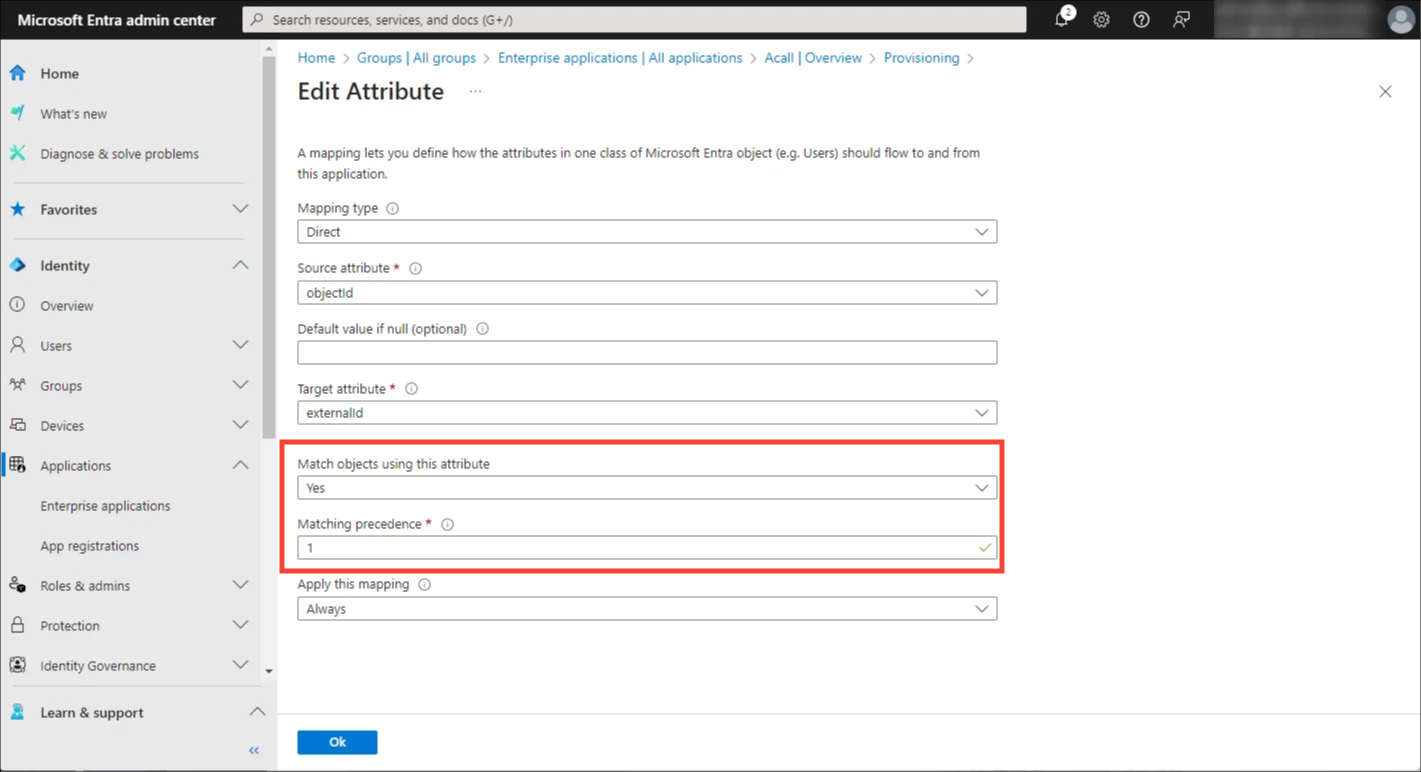
Set ‘externalId - objectId’ attribute as the key for group matching in order to match Microsoft Entra ID groups with Acall groups on a 1:1 basis.
Click [Edit] for ‘externalId - objectId’.
Select “Yes” from “Match objects using this attribute” dropdown and enter "1" in [Matching precedence] then click [OK].
Click [Save].
If the settings are correctly done, attribute mapping for groups would look like below.
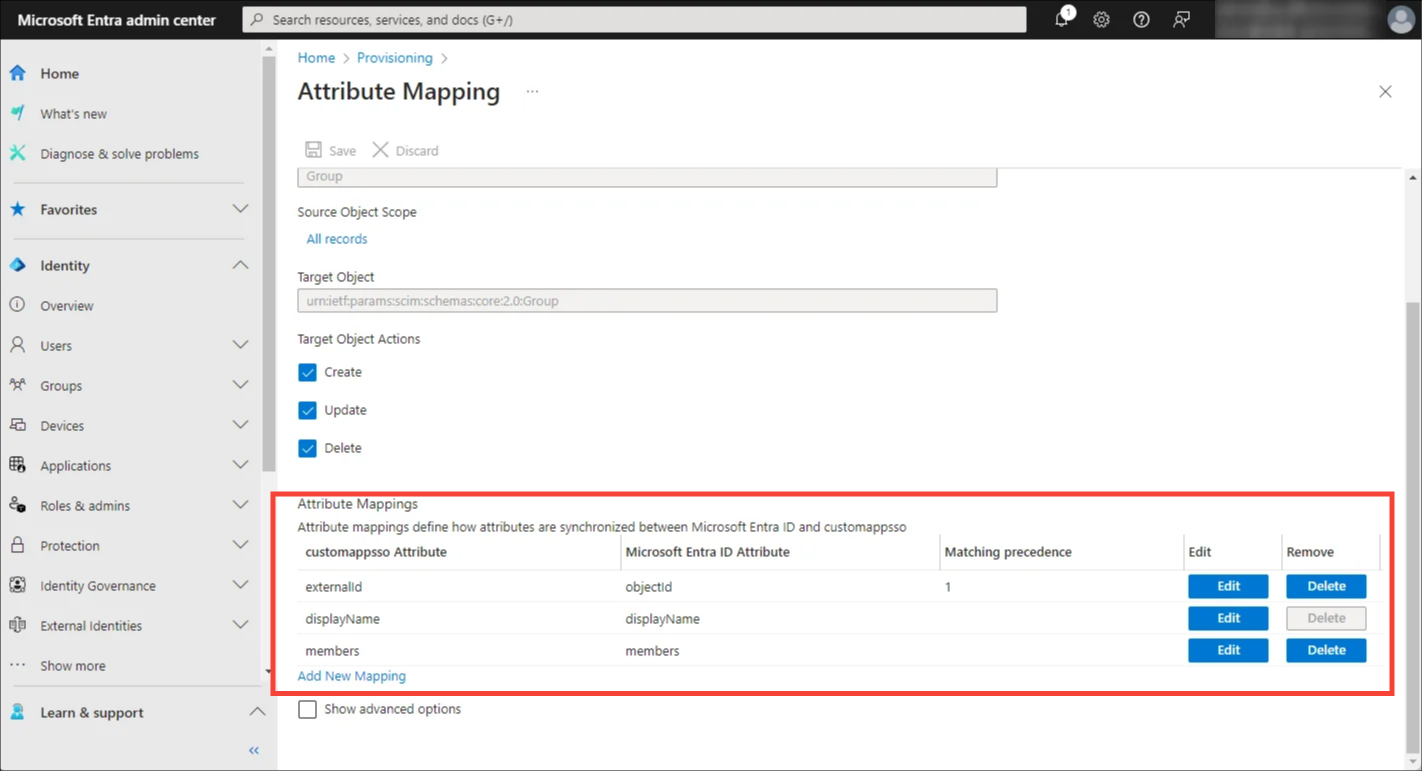
When mapping settings are complete, click [Save].
Enable Group Provisioning
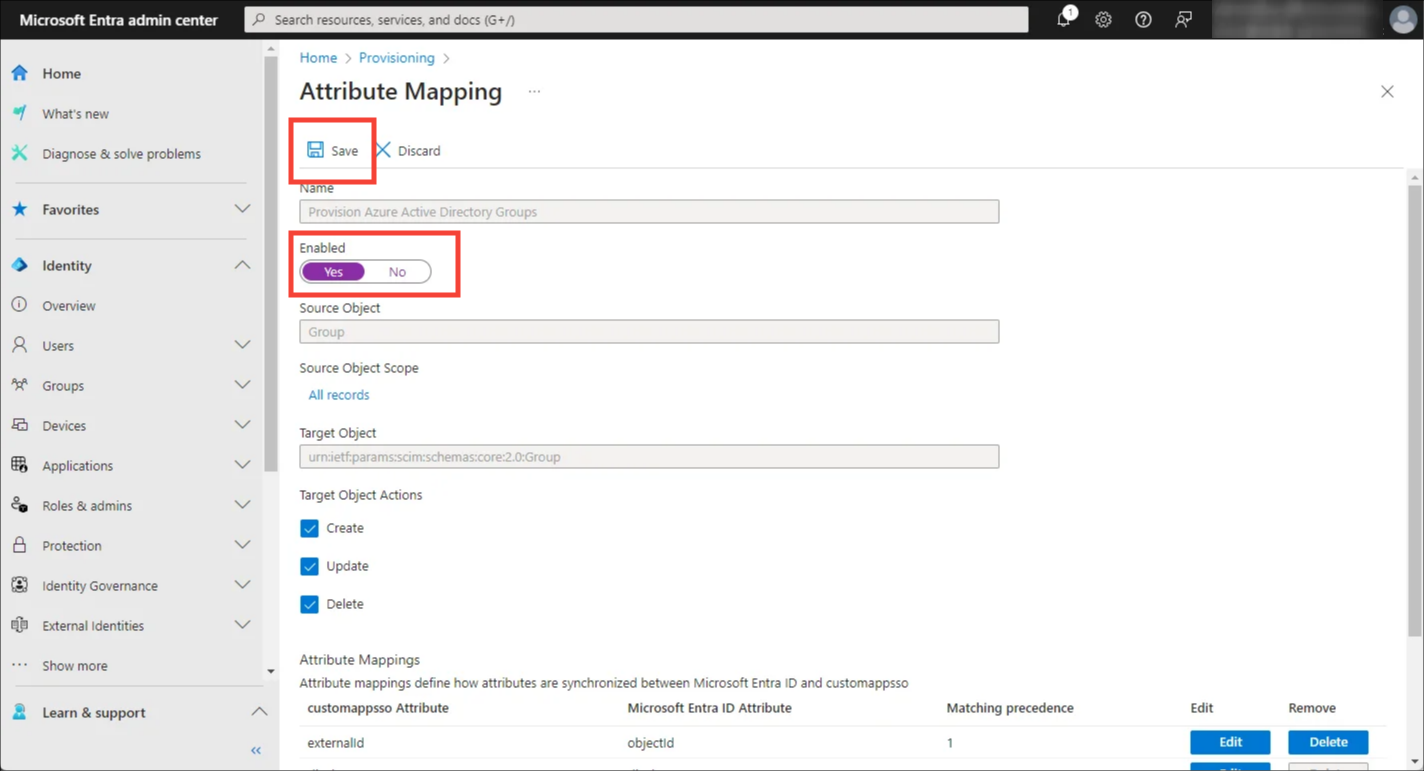
Turn the [Enabled] toggle to ‘Yes’ and click [Save].
Start Provisioning
To start provisioning, follow the steps of "Start Provisioning" in the help article "[Entra ID] Provisioning Settings".
See also FAQ about group provisioning.