
- Help Center > Company Setting・Organization Management > SSO・Provisioning > Okta > [Okta] Provisioning Settings
Help Center
[Okta] Provisioning Settings
- Category :
Answer
Contents
This page describes how to set up to use the provisioning function.
 Note
Kindly note that the contents, screen captures and the order of steps on this manual may differ if Okta changes the specifications. You may cross-check the instructions from Okta.
Set up Provisioning
Contact Acall to Issue A Secret Token
Contact Acall via contact form to issue a secret token. Acall will come back to you within 5 working days.
Add SCIM App
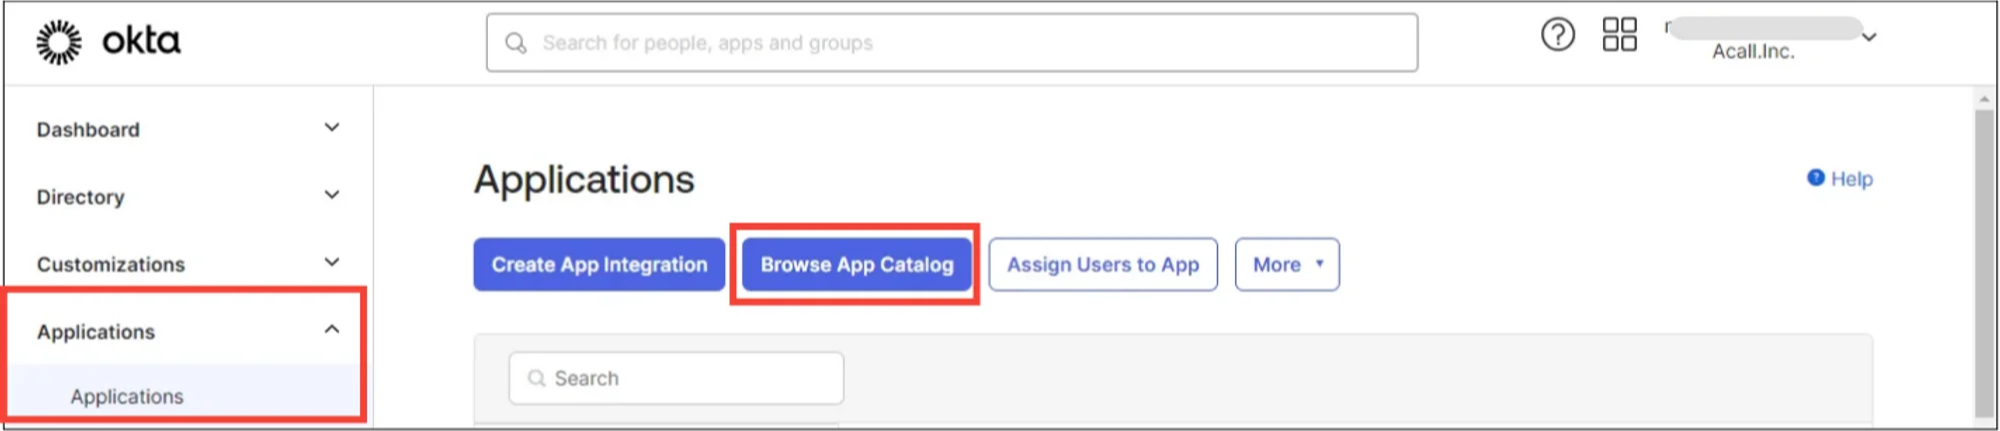
Click [Applications] > [Applications] in the menu bar and click [Browse App Catalog] on the Okta admin console.
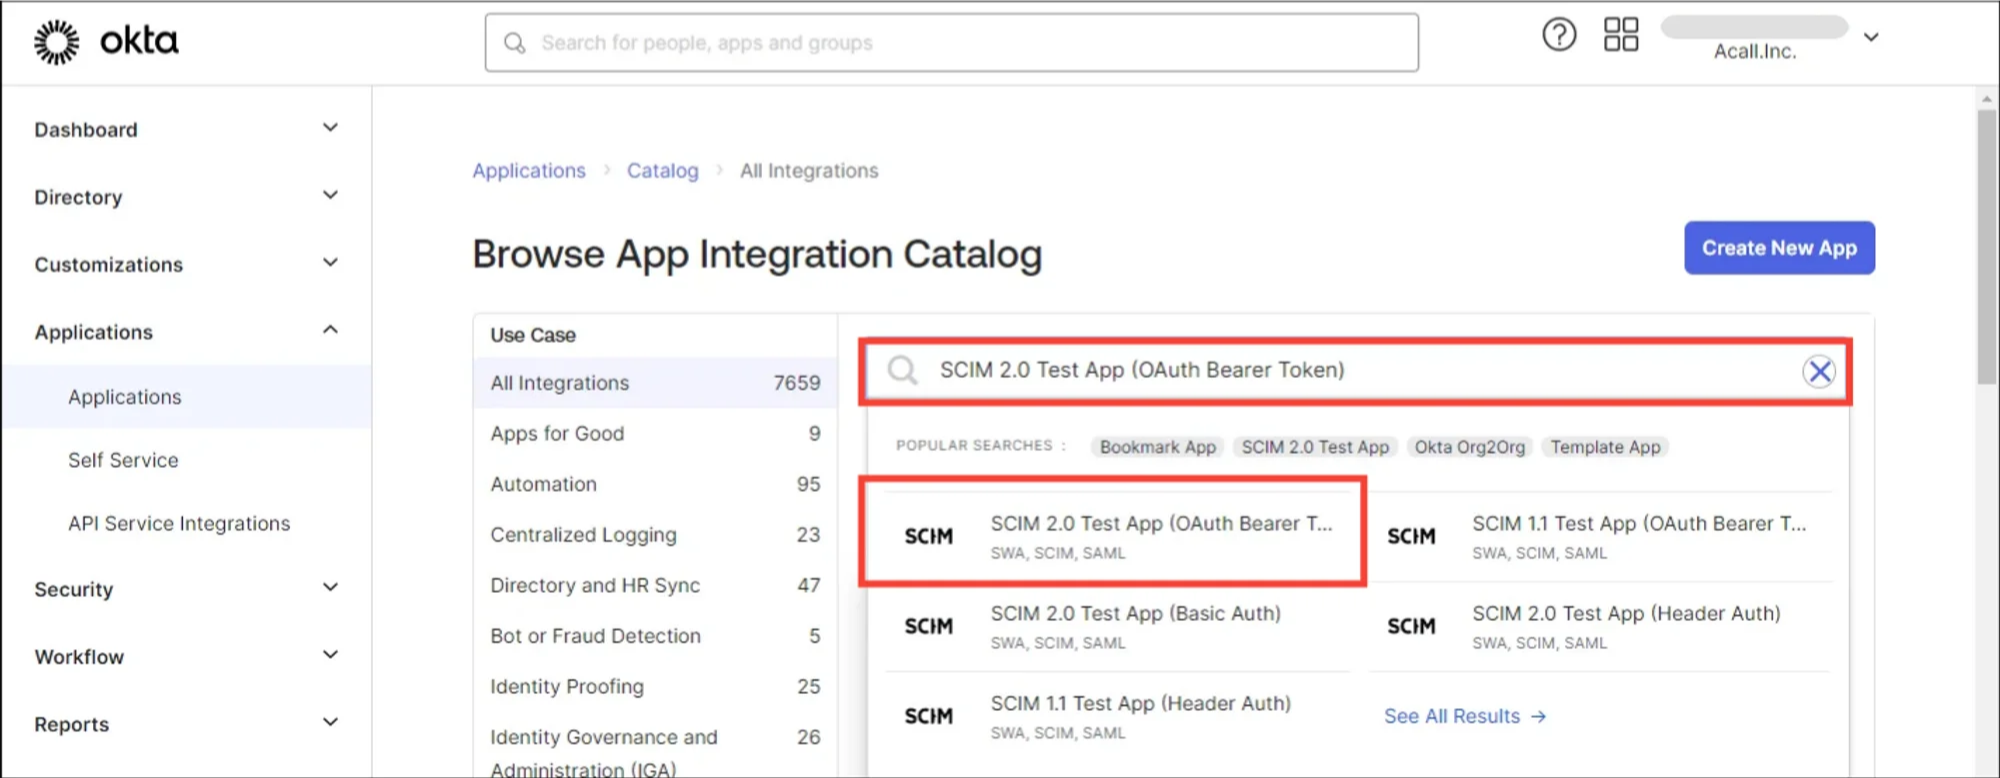
Search “SCIM 2.0 Test App (OAuth Bearer Token)” and select.
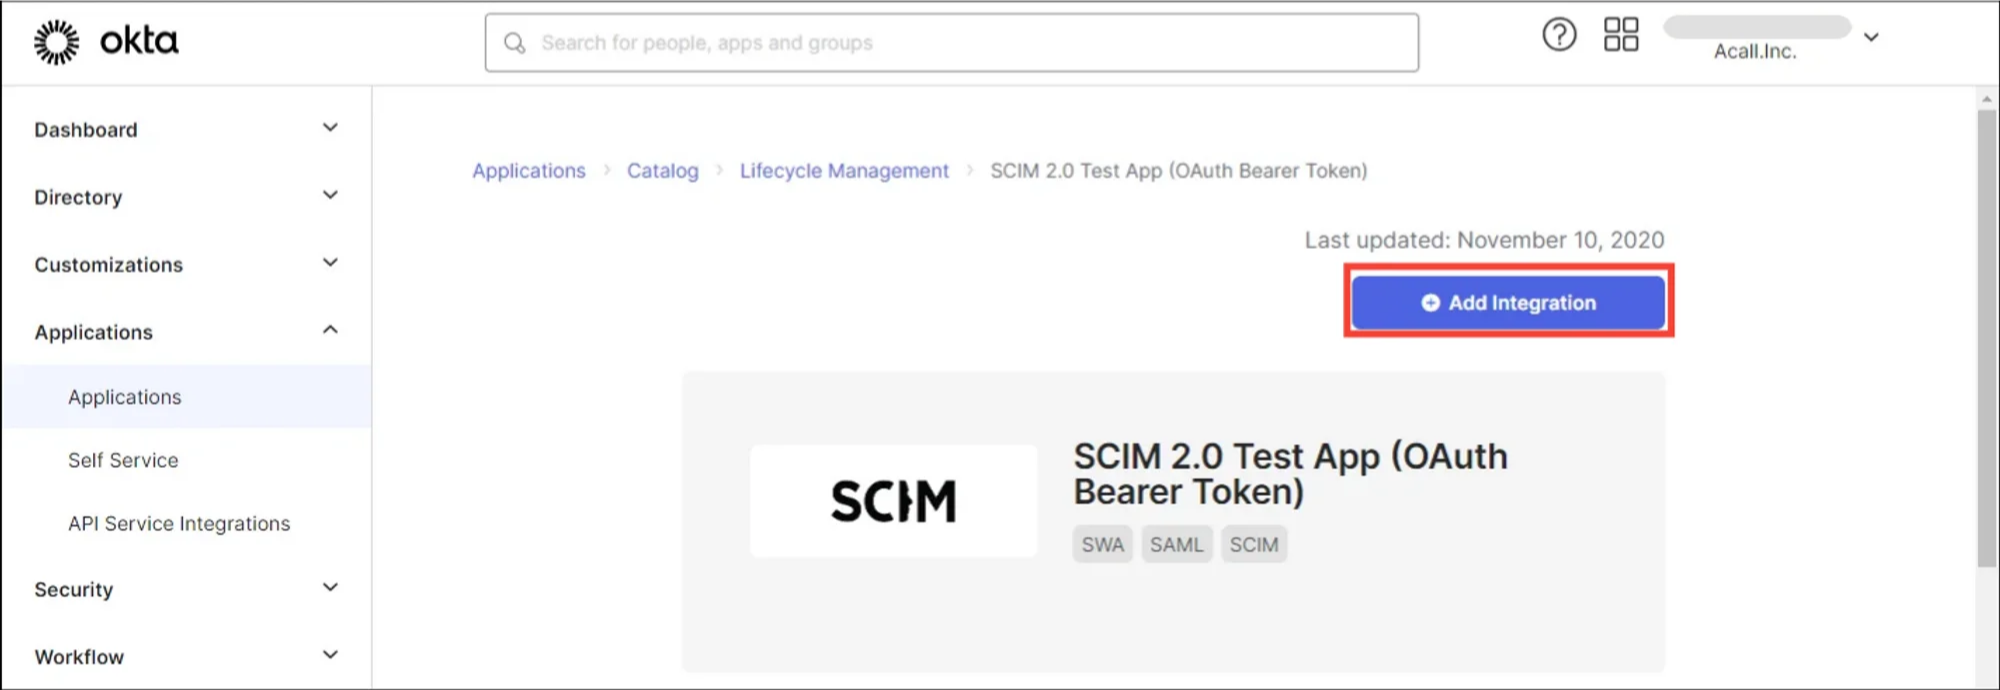
Click [Add Integration].
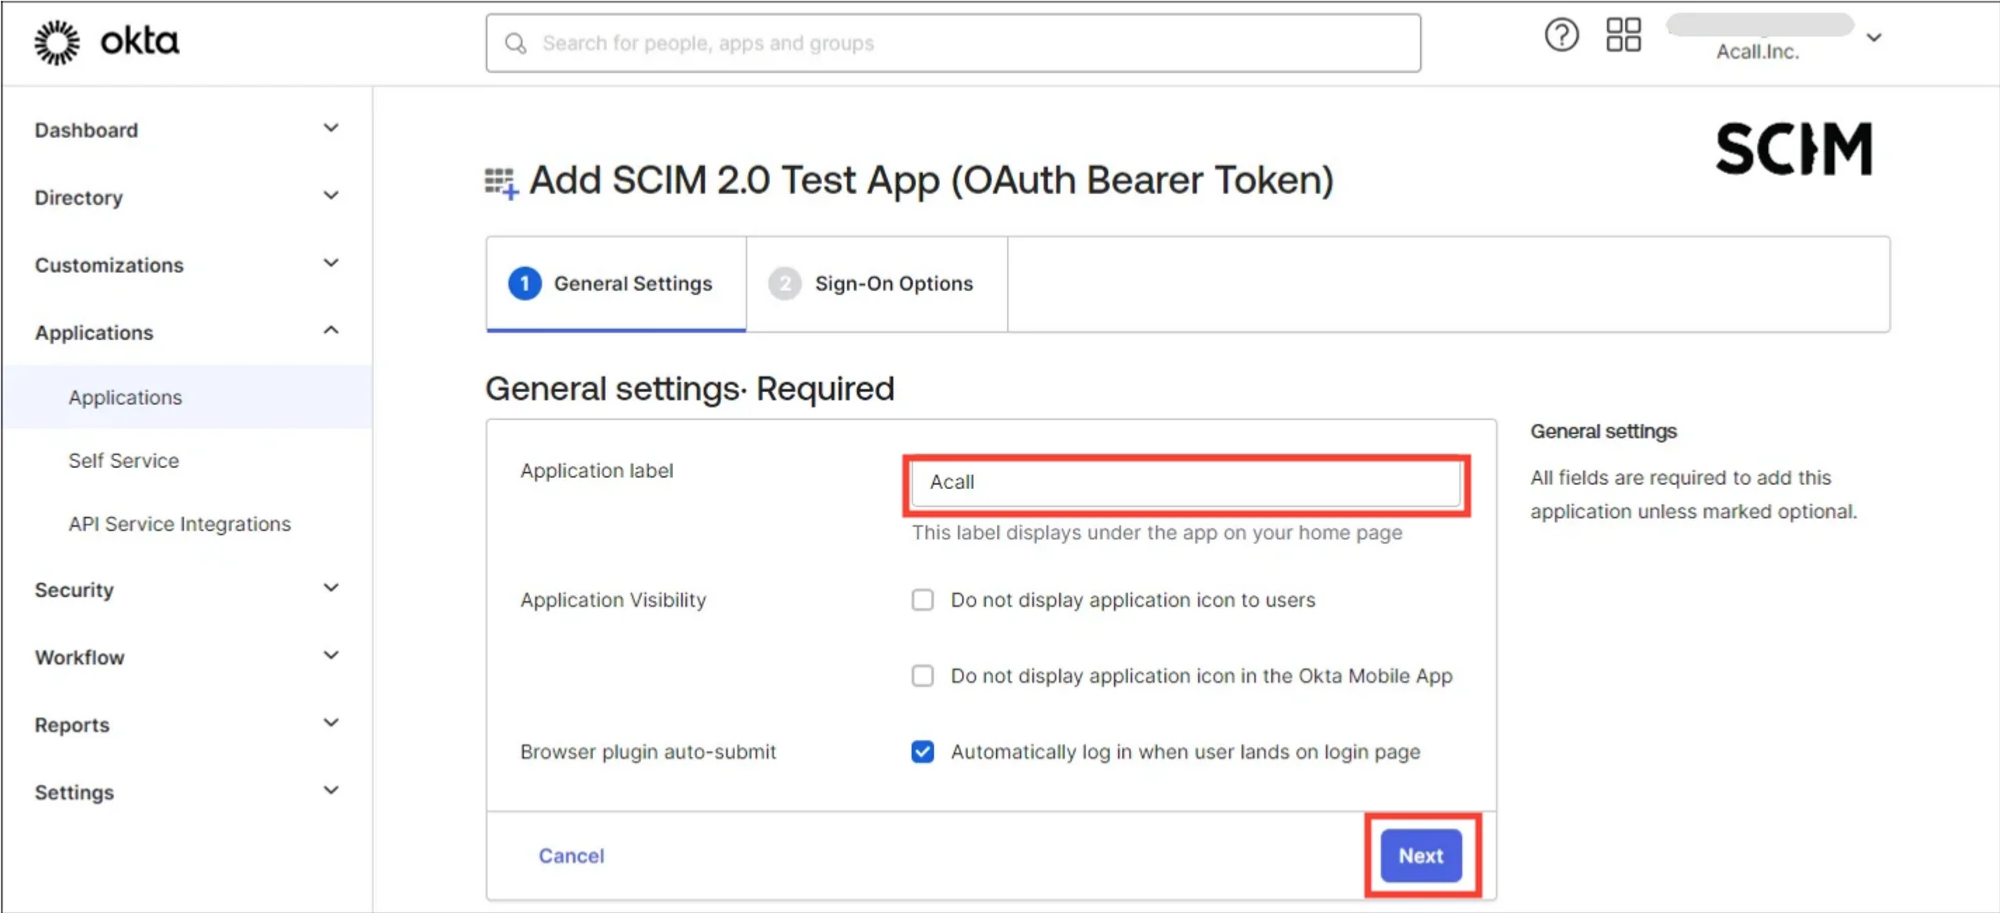
Enter any application name and click [Next], then click [Done] to complete.
Select Provisioning Option
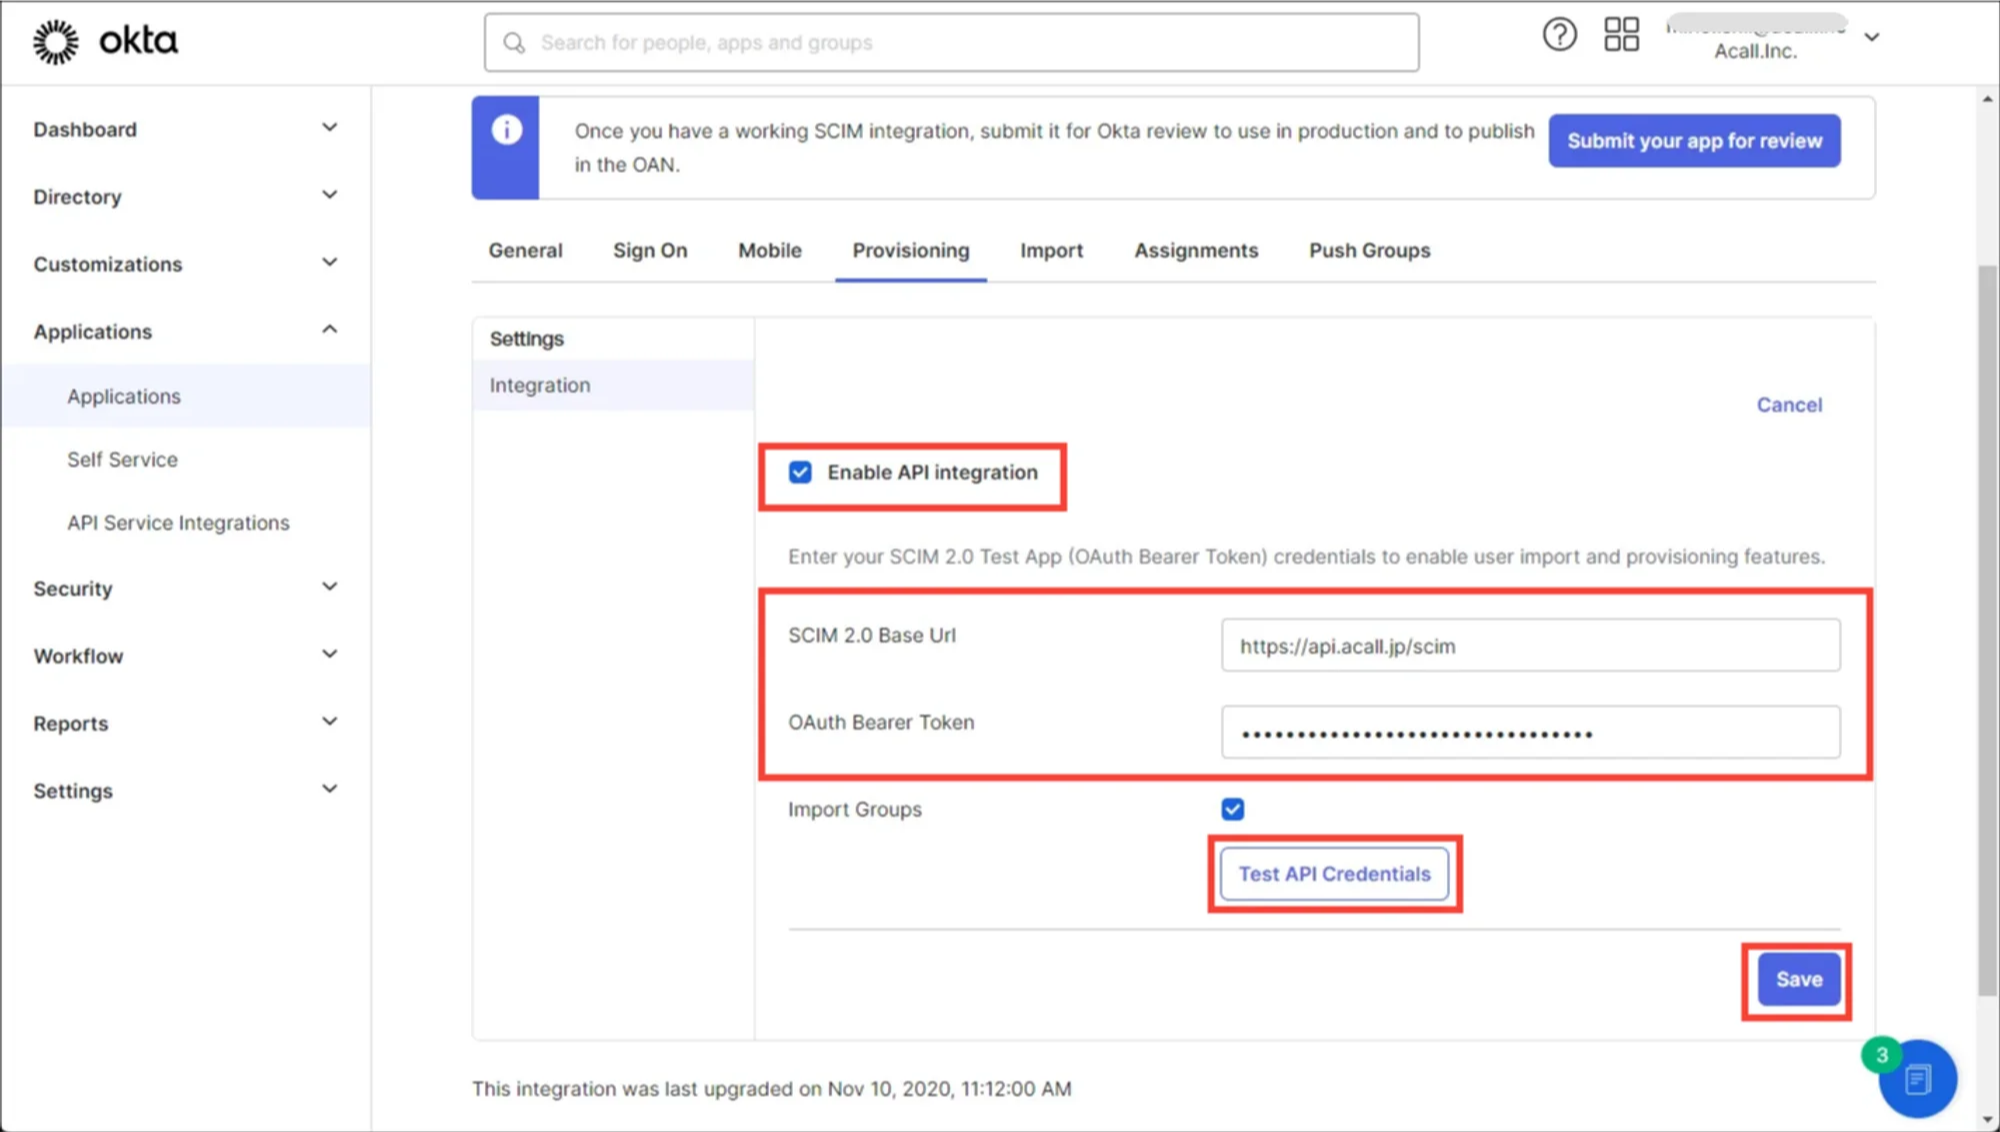
Open “Provisioning” tab for the created application and click [Configure API Integration]. Check the “Enable API Integration” box.
Enter the following information and click [Test API Credentials] to check the connection.
If there are no errors, click [Save].
| Items | Values |
|---|---|
| SCIM 2.0 Base Url |
*Do not put / at the end of the URL. |
| OAuth Bearer Token | Secret Token (Issued by Acall) |
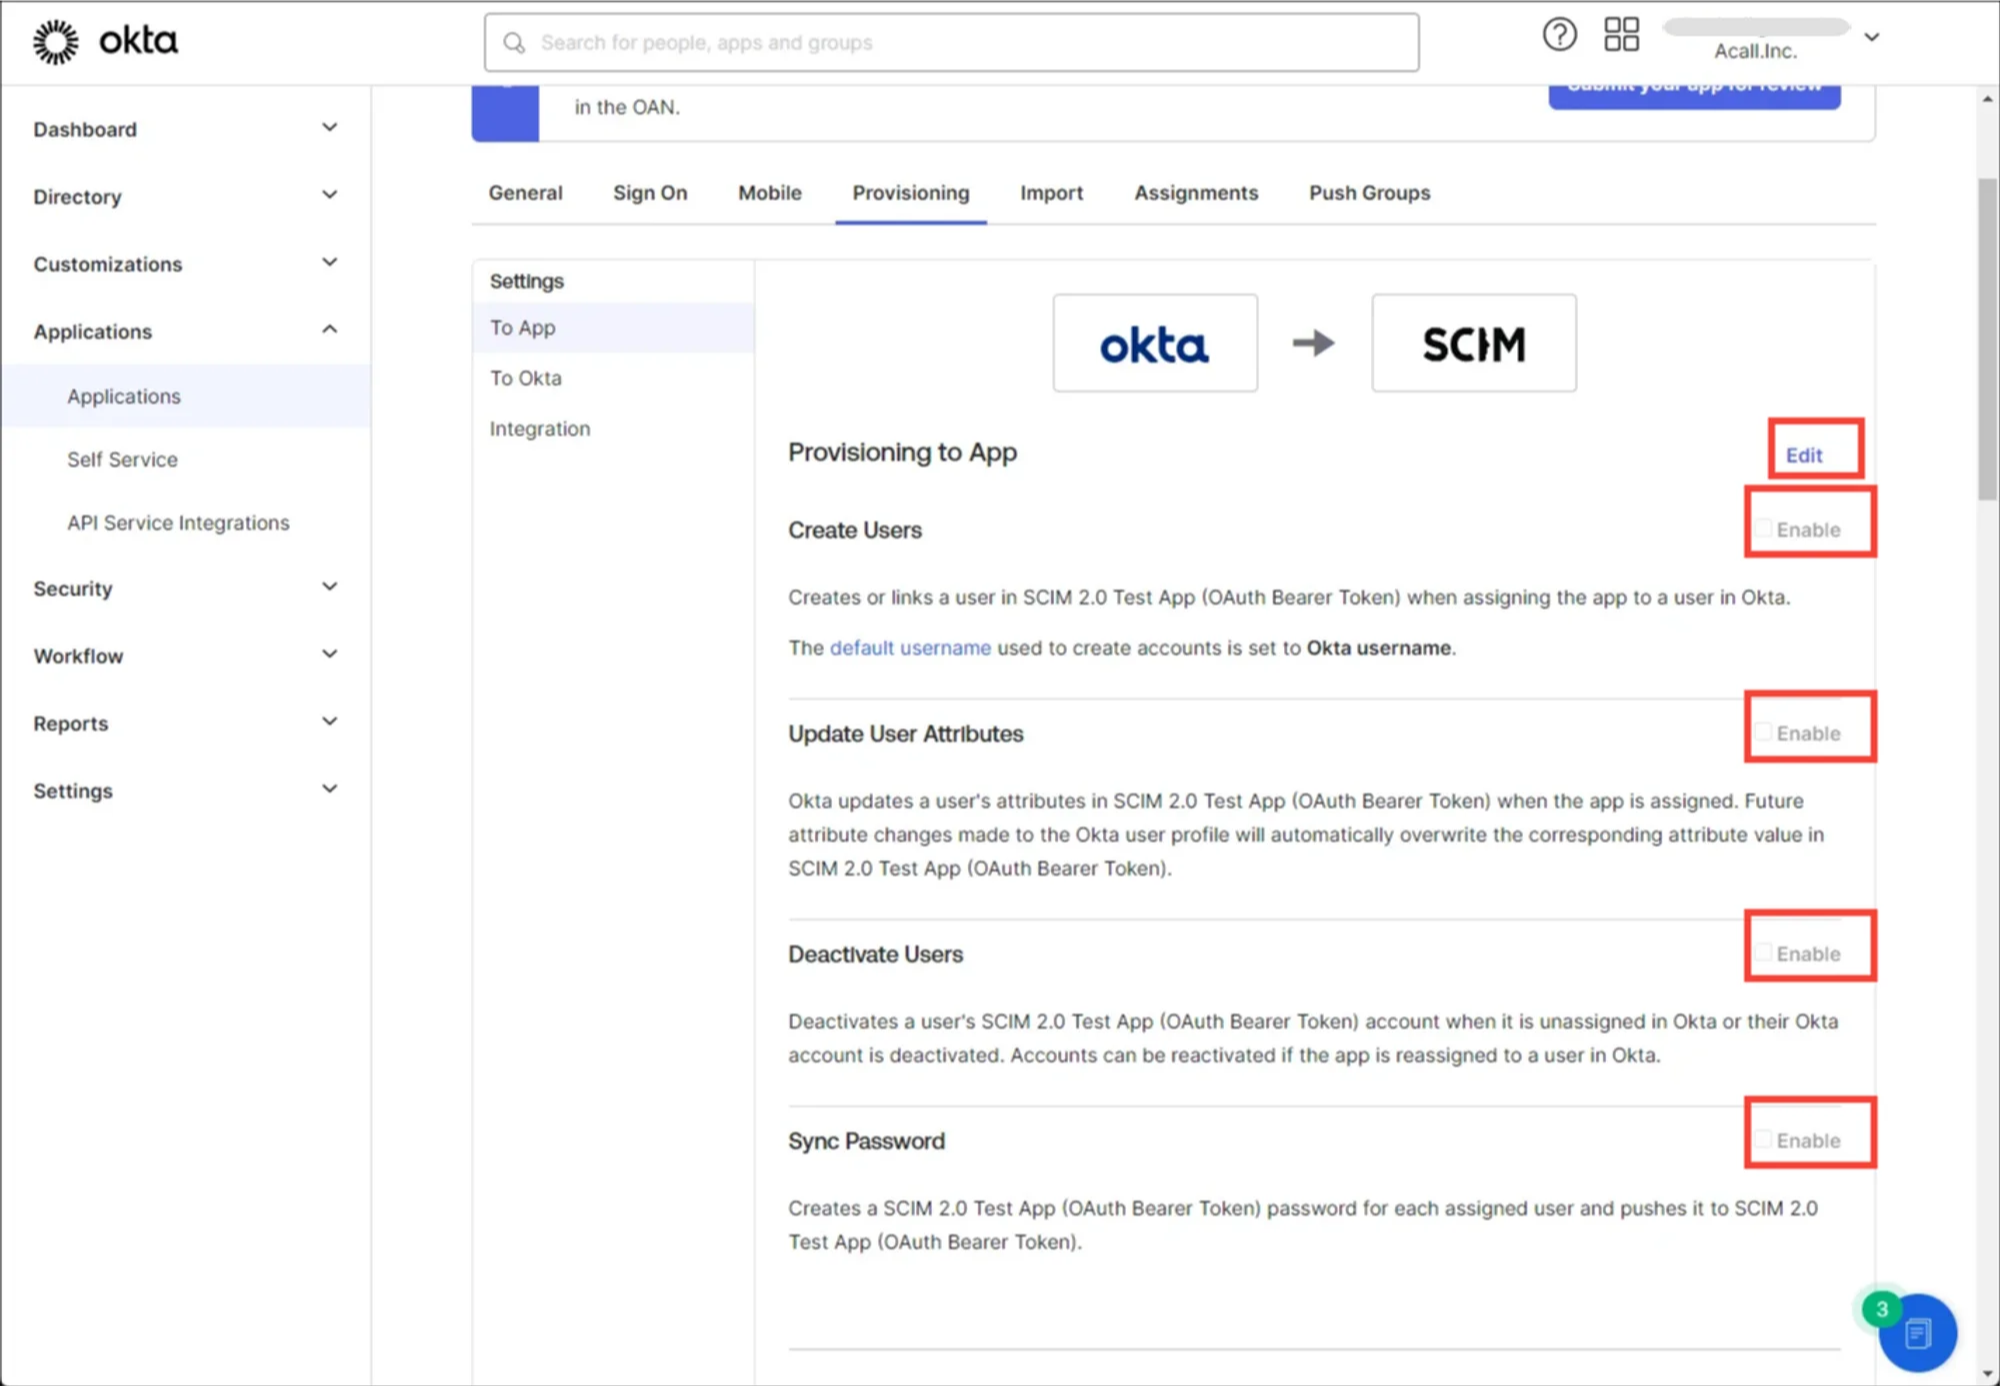
Click [Edit] and check all the boxes then save.
Add Attribute
Click [Directory] > [Profile Editor] in the menu bar and select the application for Acall provisioning.
Delete “roles” attribute by clicking [x] button in “Profile Editor” screen.
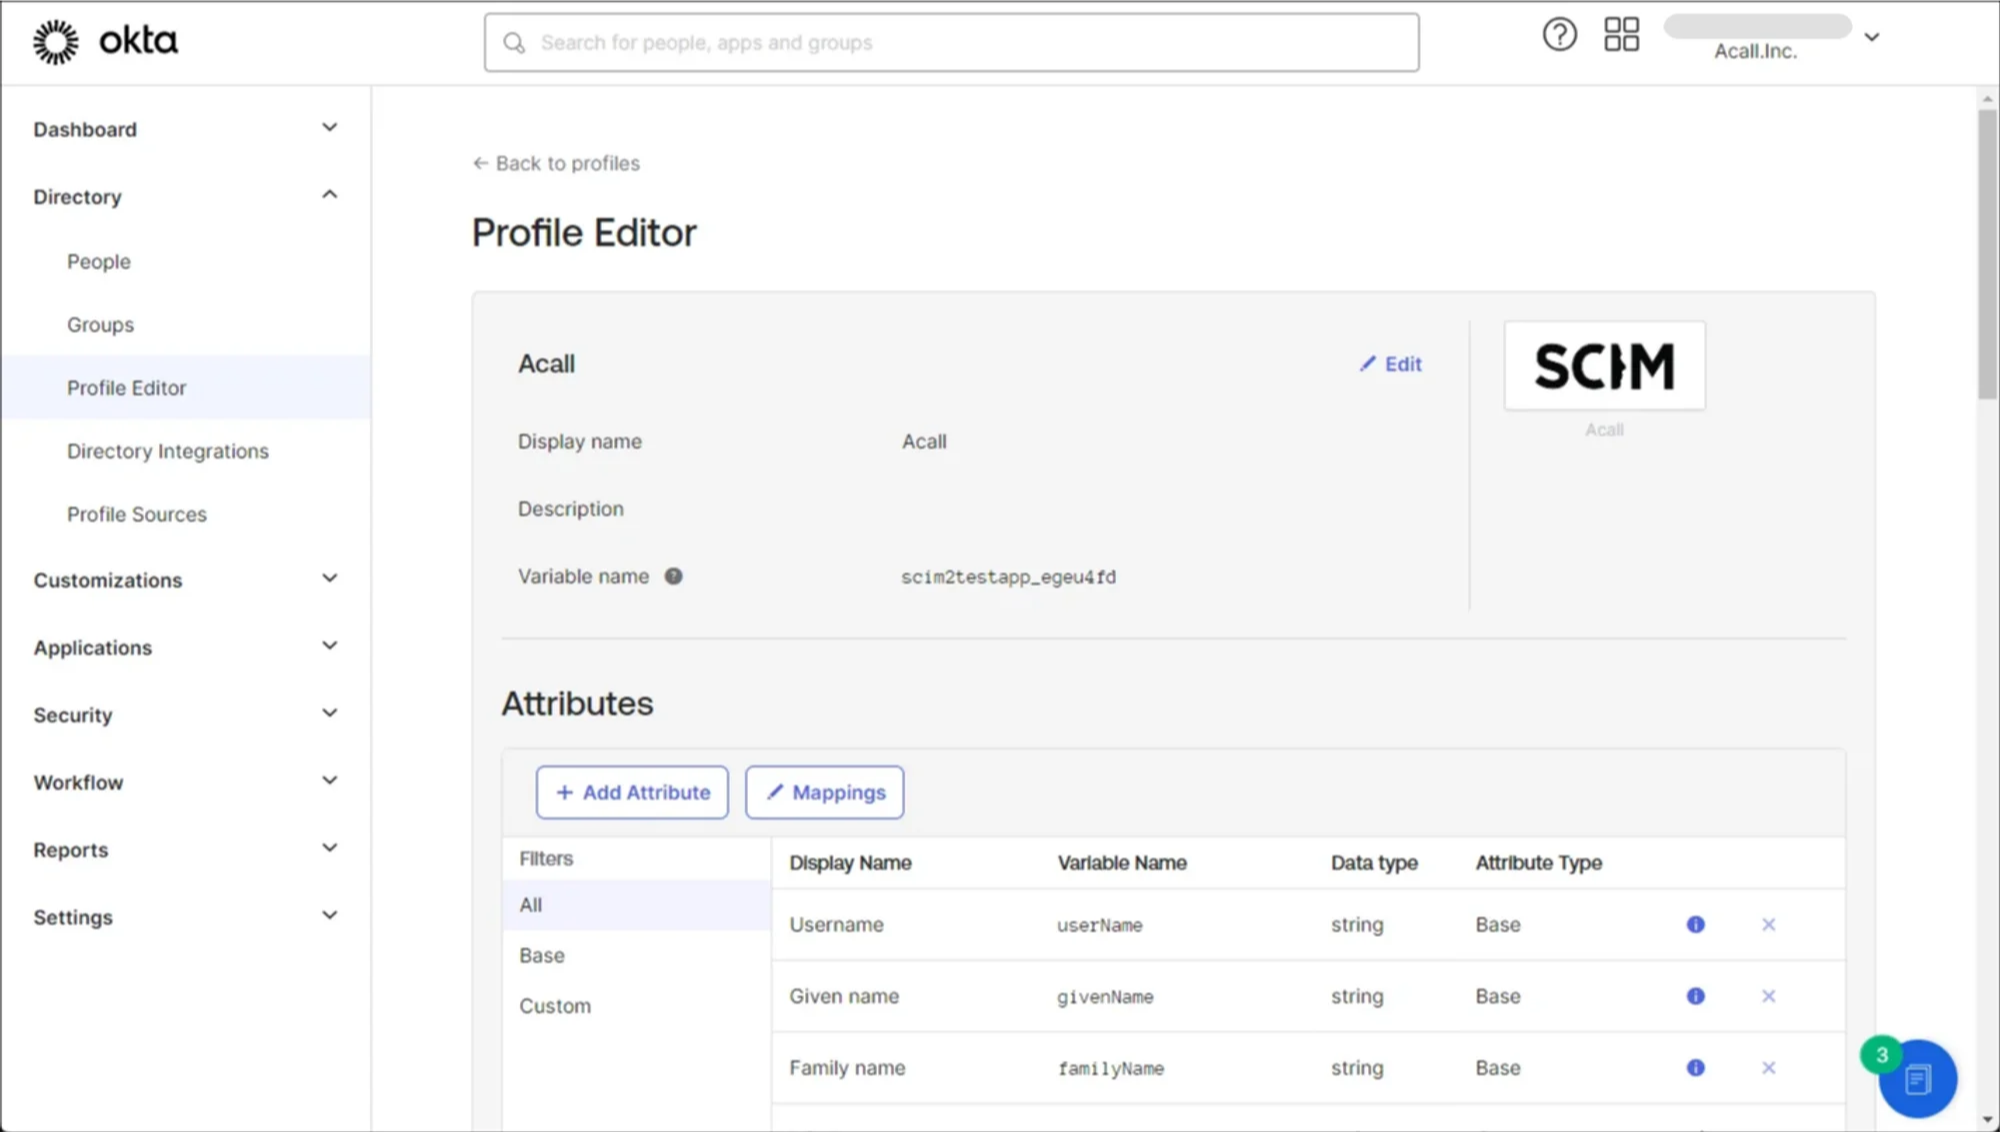

Click [+Add Attribute] and add each attribute as follows .
Please [ Save ] and register one item at a time, as continued registration may fail.
・ All”Data type” should be set to “string”.
・ Check “Personal” for all “Attribute Type”
・Remain other items as default values.
| Display name | Variable name | External name | External namespace |
|---|---|---|---|
| Primary role | primary_role | roles.^[primary=='true'].value | urn:ietf:params:scim:schemas:core:2.0:User |
| Tel to Call Number | tel_to_call_numbers | phoneNumbers.^[type=='sms'].value | urn:ietf:params:scim:schemas:core:2.0:User |
| Extension Number | extension_number | phoneNumbers.^[type=='work'].value | urn:ietf:params:scim:schemas:core:2.0:User |
| SMS Number | sms_number | phoneNumbers.^[type=='mobile'].value | urn:ietf:params:scim:schemas:core:2.0:User |
| Slack Account | slack_account | accounts.^[type=='slack'].value | urn:ietf:params:scim:schemas:core:2.0:User |
| Google Account | google_account | accounts.^[type=='google'].value | urn:ietf:params:scim:schemas:core:2.0:User |
| familyNamePhonetic | family_name_phonetic | name.familyNamePhonetic | urn:ietf:params:scim:schemas:extension:wsos:2.0:User |
| givenNamePhonetic | given_name_phonetic | name.givenNamePhonetic | urn:ietf:params:scim:schemas:extension:wsos:2.0:User |
| Additional information | additional_information | additionalInformation | urn:ietf:params:scim:schemas:extension:wsos:2.0:User |
Set up Mapping
Click [Applications] > [Applications] in the menu bar and select the application for Acall provisioning.
Open [Provisioning] tab and set up mapping as follows in “To App” screen.
Attributes that are not in the table need to be deleted by clicking the [×] button.
| Attribute | Attribute value1 | Attribute value2 | Apply on |
|---|---|---|---|
| Username | - | - | - |
| Given name | Map from Okta Profile | firstName | Create and update |
| Family name | Map from Okta Profile | lastName | Create and update |
| Display name | Expression | user.firstName + + user.lastName | Create and update |
| Primary role | Expression | String.stringSwitch(user.email, "general", "admin@ex.com", "admin") | Create and update |
| Tel to Call Number | Expression | user.mobilePhone == null ? null : user.mobilePhone | Create and update |
| Extension Number | Expression | user.primaryPhone == null ? null : user.primaryPhone | Create and update |
| SMS Number | Expression | user.mobilePhone == null ? null : user.mobilePhone | Create and update |
| Slack Account | Expression | user.email | Create and update |
| Google Account | Expression | user.email | Create and update |
| Additional information | Map from Okta Profile | user.userType | Create and update |
※You can set up from [Mapping] in Profile Editor.
Reference: Map Okta attributes to app attributes in the Profile Editor
Open [To Okta] screen.
Delete all attribute mapping except "Username” by clicking [x] button.
Assign App to Users
Open “Assignments” tab for the created application and click [Assign]. Select “Assign to People” or “Assign to Groups” from [Assign] pull-down.
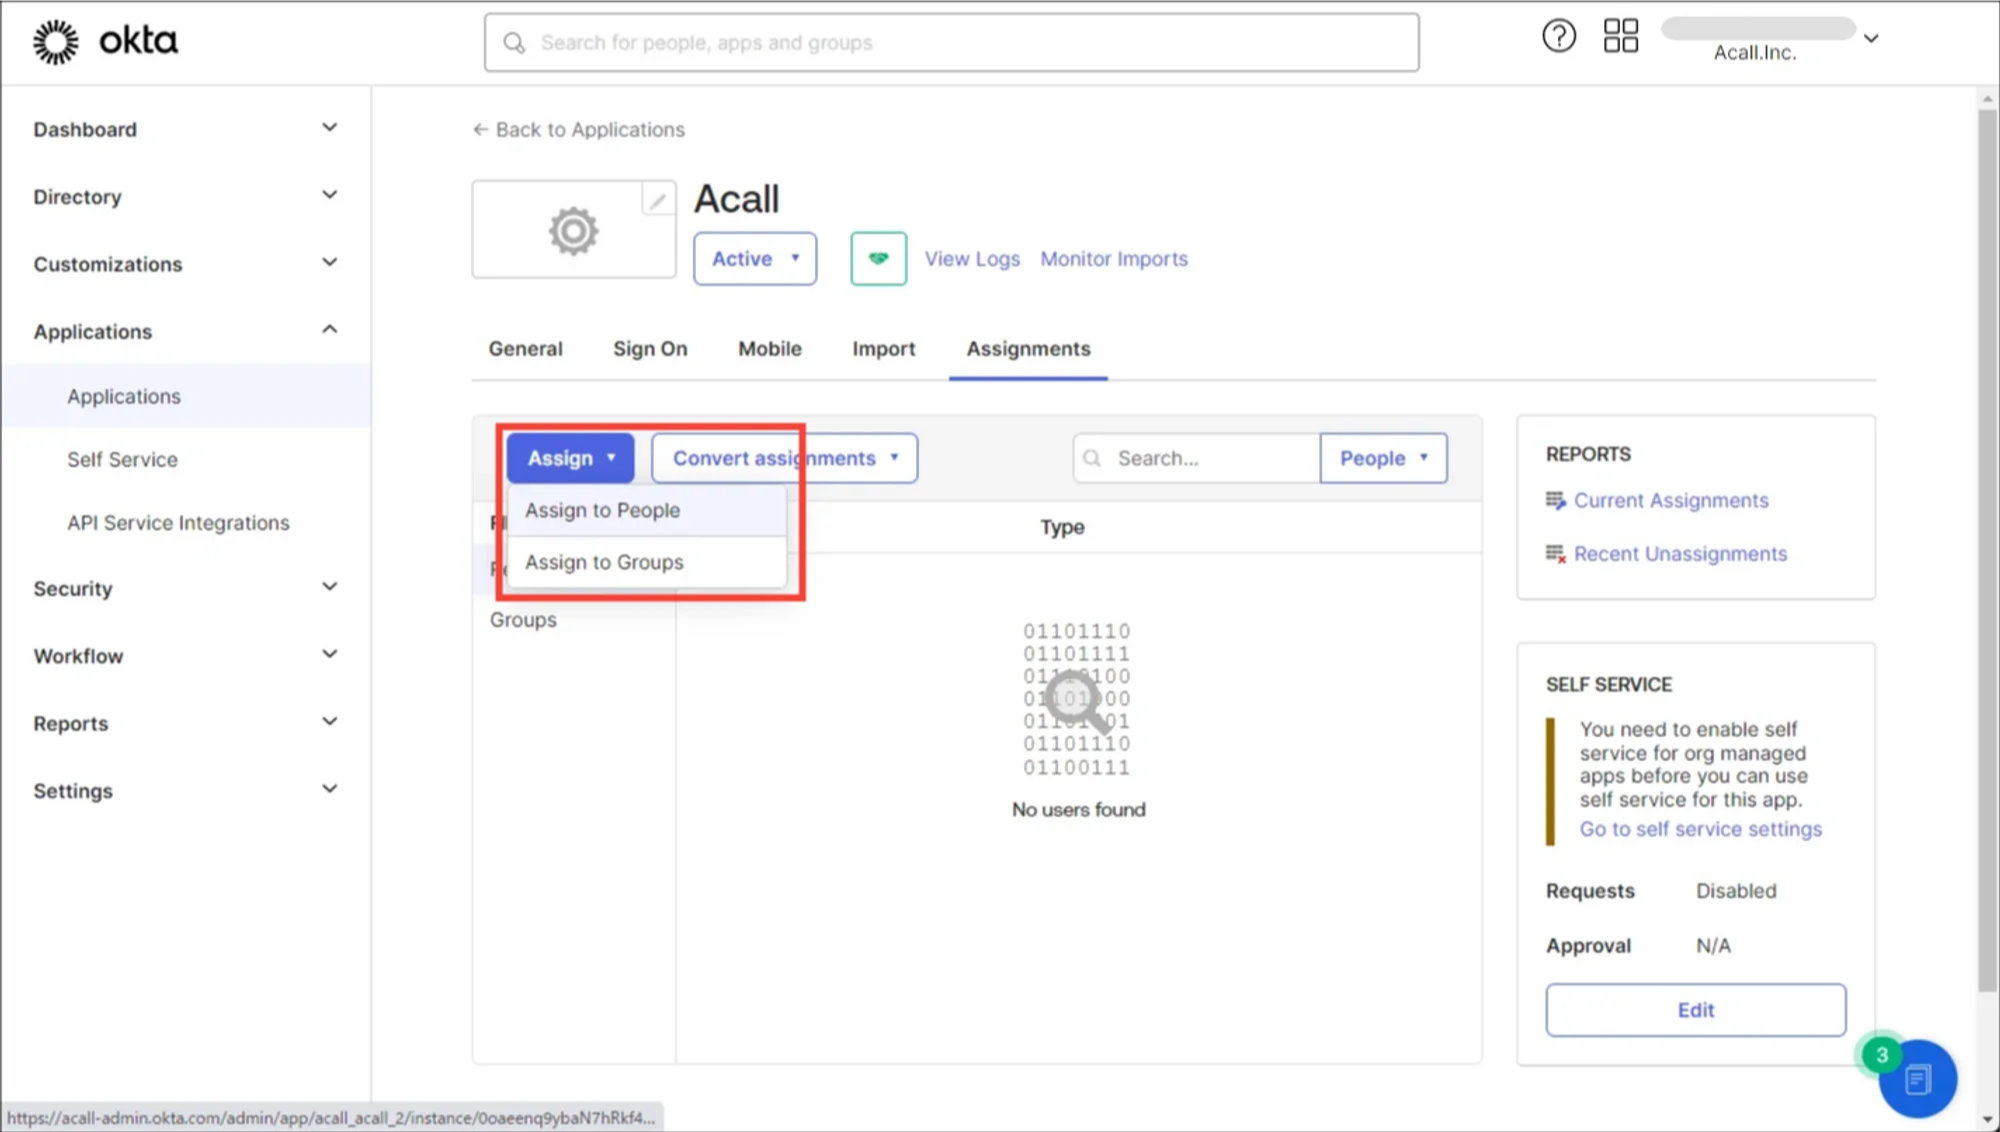
Click [Assign] for the user or group you want to add to the application and click [Save and Go Back].
Once you confirm the added member is “Assigned”, click [Done].
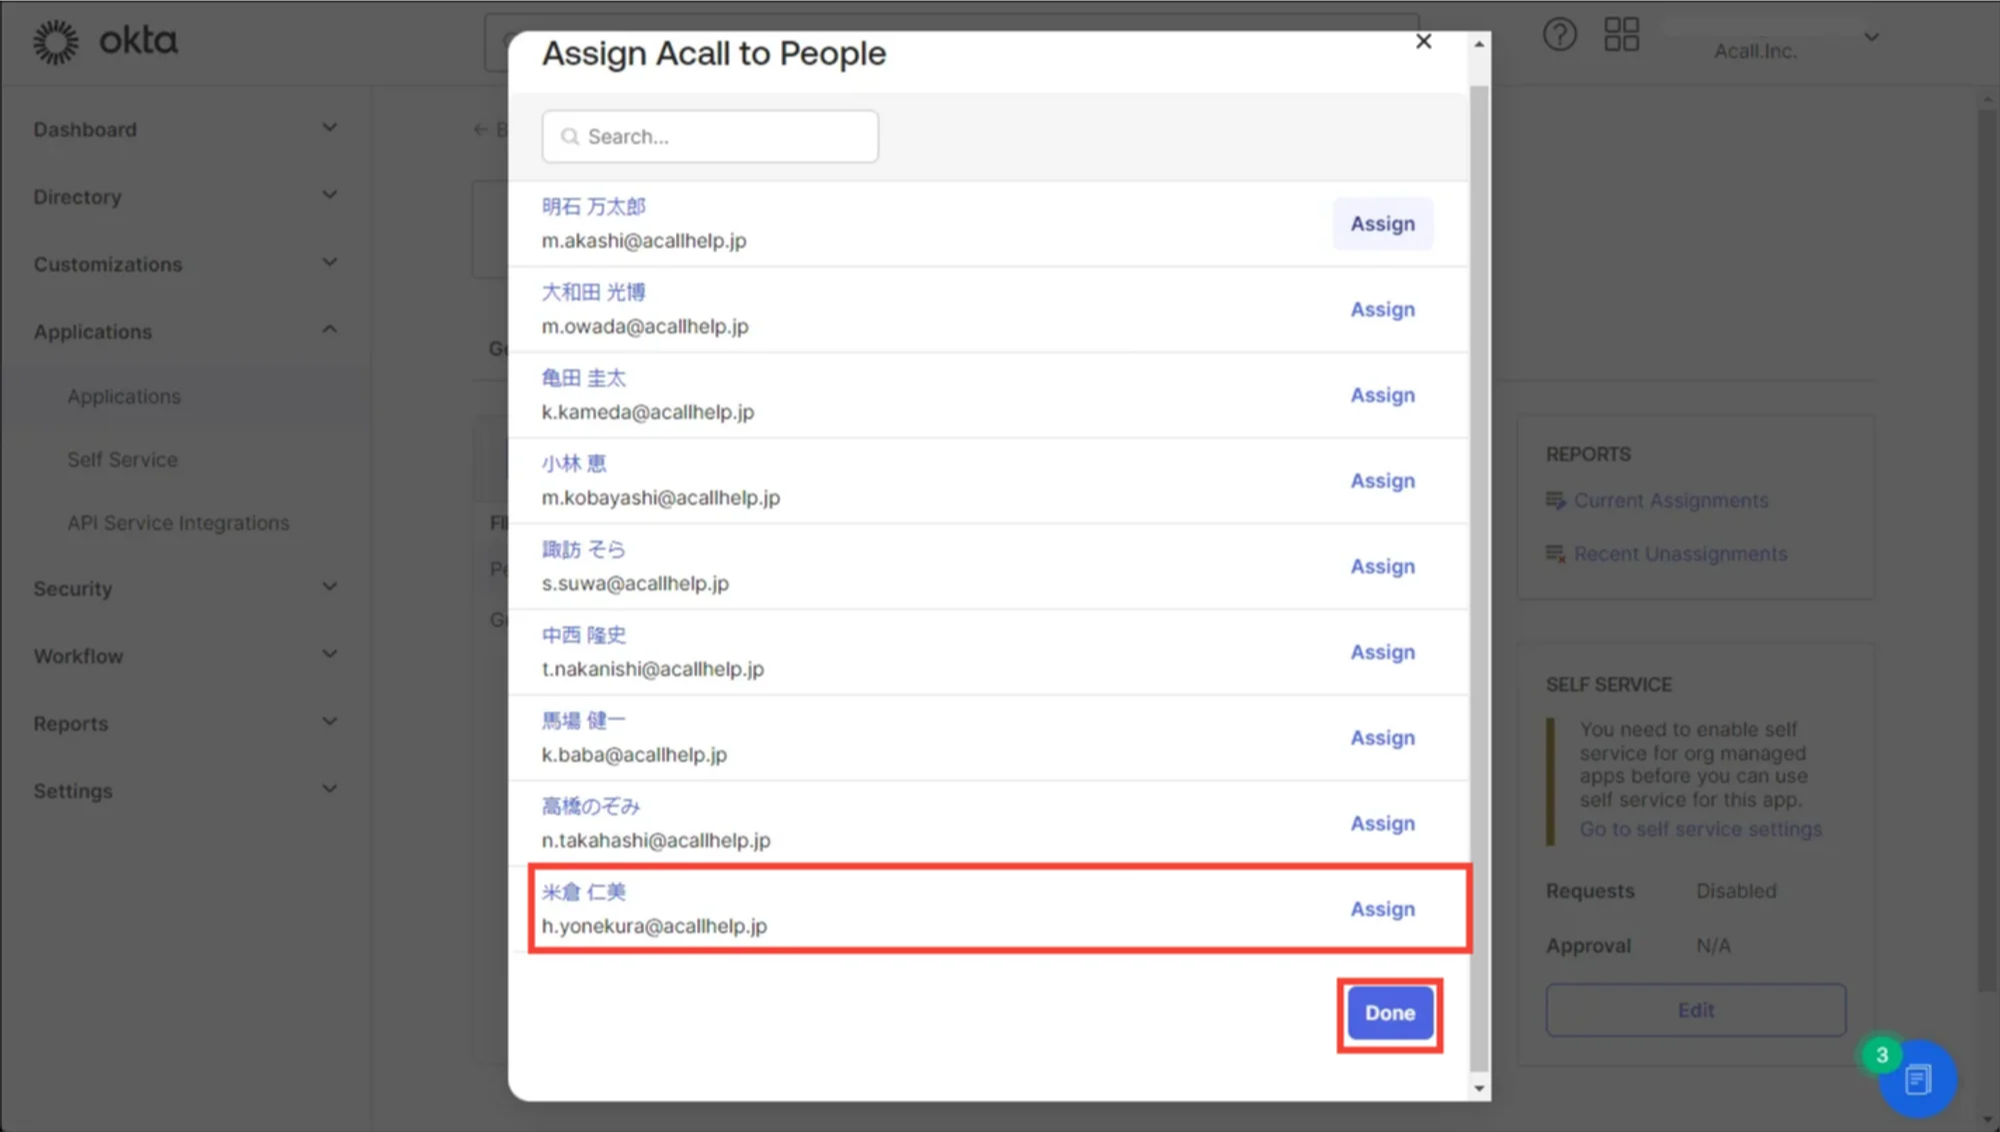
After assigning, provisioning process is automatically executed.
If the user's "External Id" has a value, provisioning is completed.
※If there is no "External Id", delete the assignment and reassign it.
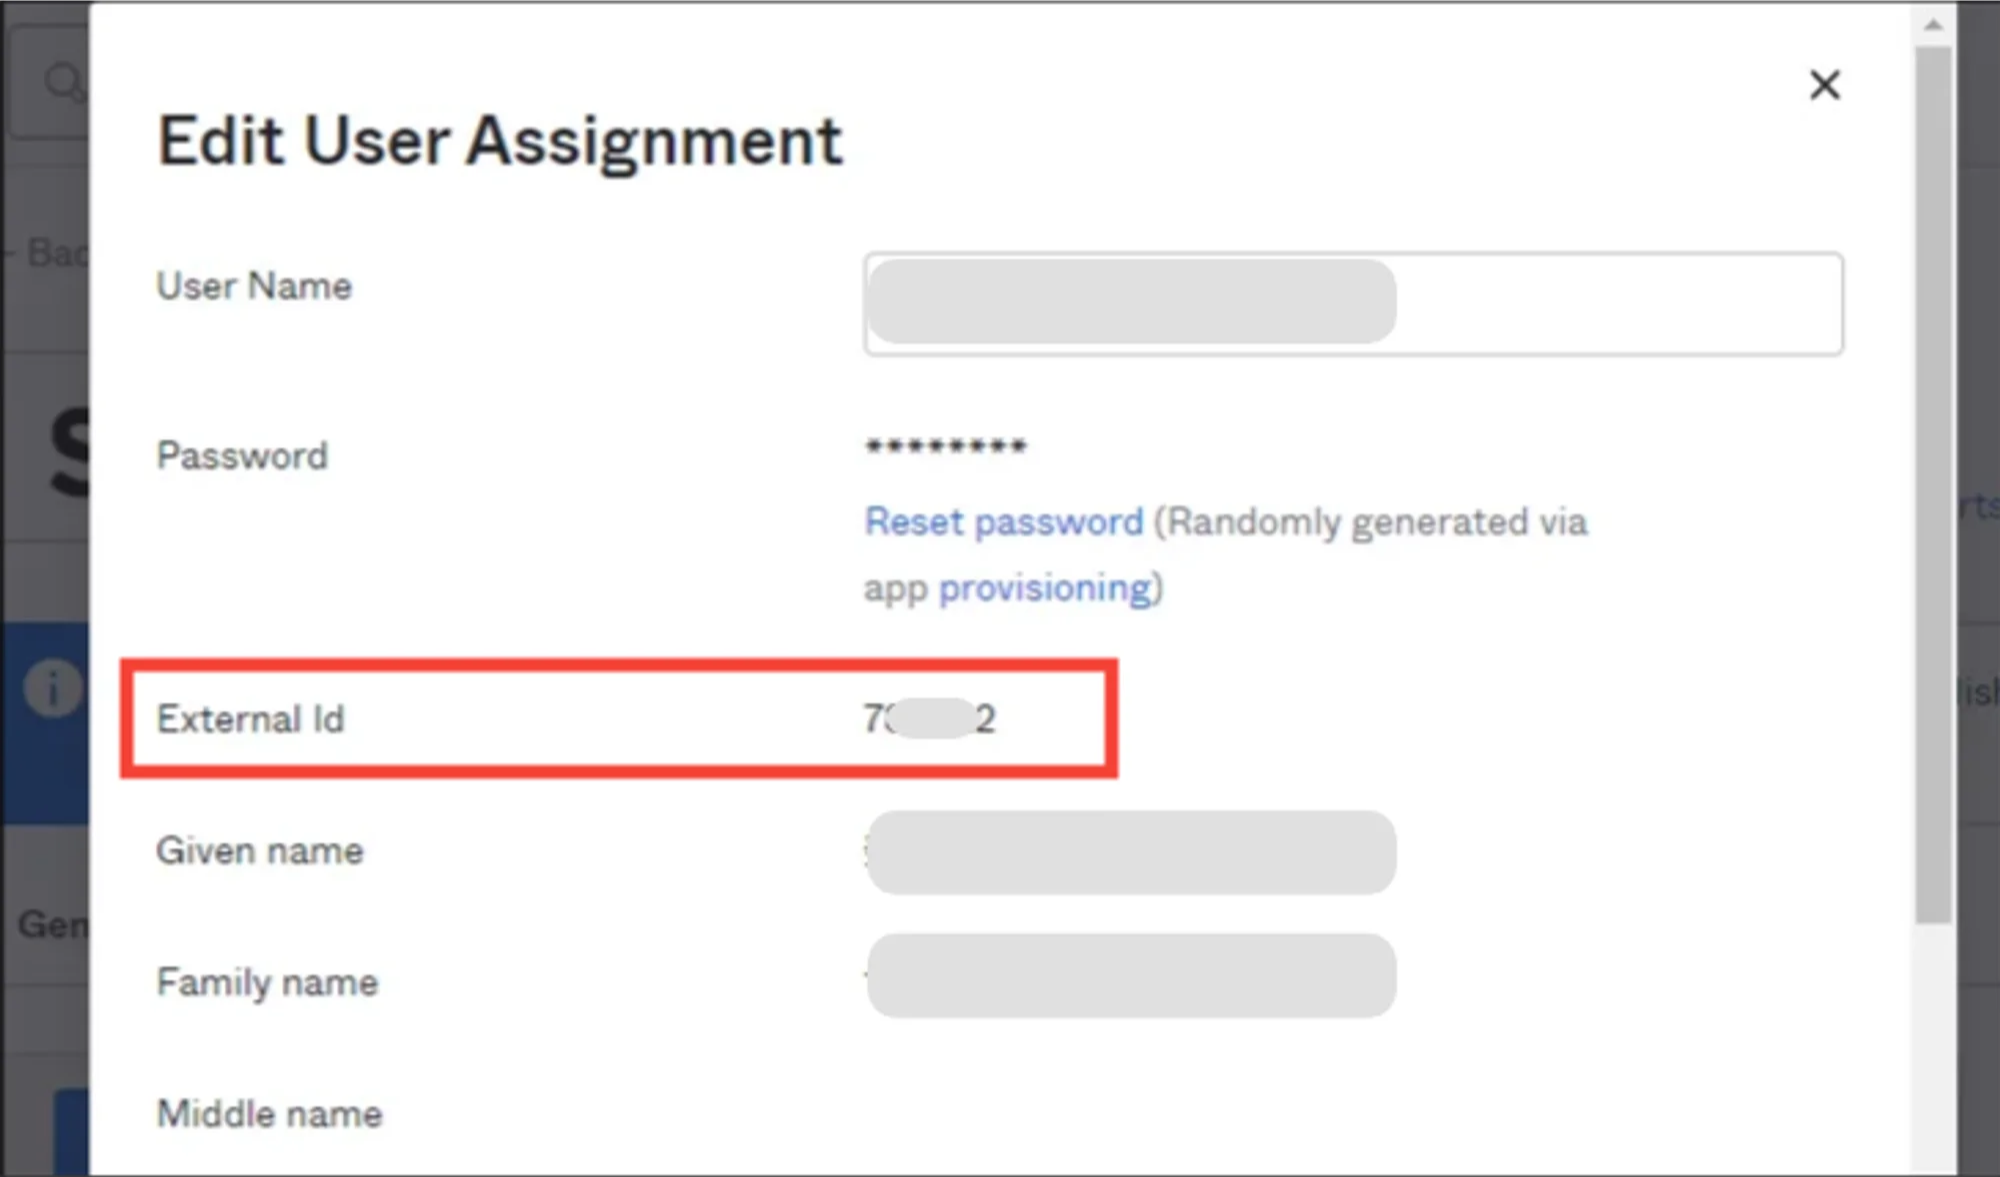
If there is no External Id, delete the assignment and reassign it.

